The Ducati ST was made in three main models, the ST2, ST4 and ST3. The major difference is the engine between them. They are all in the sport touring (ST) class and all have the same bodywork at the back and all fit the same panniers and frames. When the pannier frame is fitted it fouls the rear indicators so they must be removed from the bike and relocated onto the frame. This is fine if you run with the panniers on all of the time, but if you take them off and just keep the frames fitted then the back end of a very beautiful bike looks like dogs dinner with the indicators and frames sticking out.
My solution to this was to mount the indicators in a different position on the bike so that the frames can be fitted and removed, with or without panniers with the indicators left where they are. To do this I started with a smaller set of LED indicators (£8 from ebay) and an aluminium mount that I made myself. The reason for the mount was to make sure that the indicators were not too close together, these are 30cm (12 inches) from tip to tip.
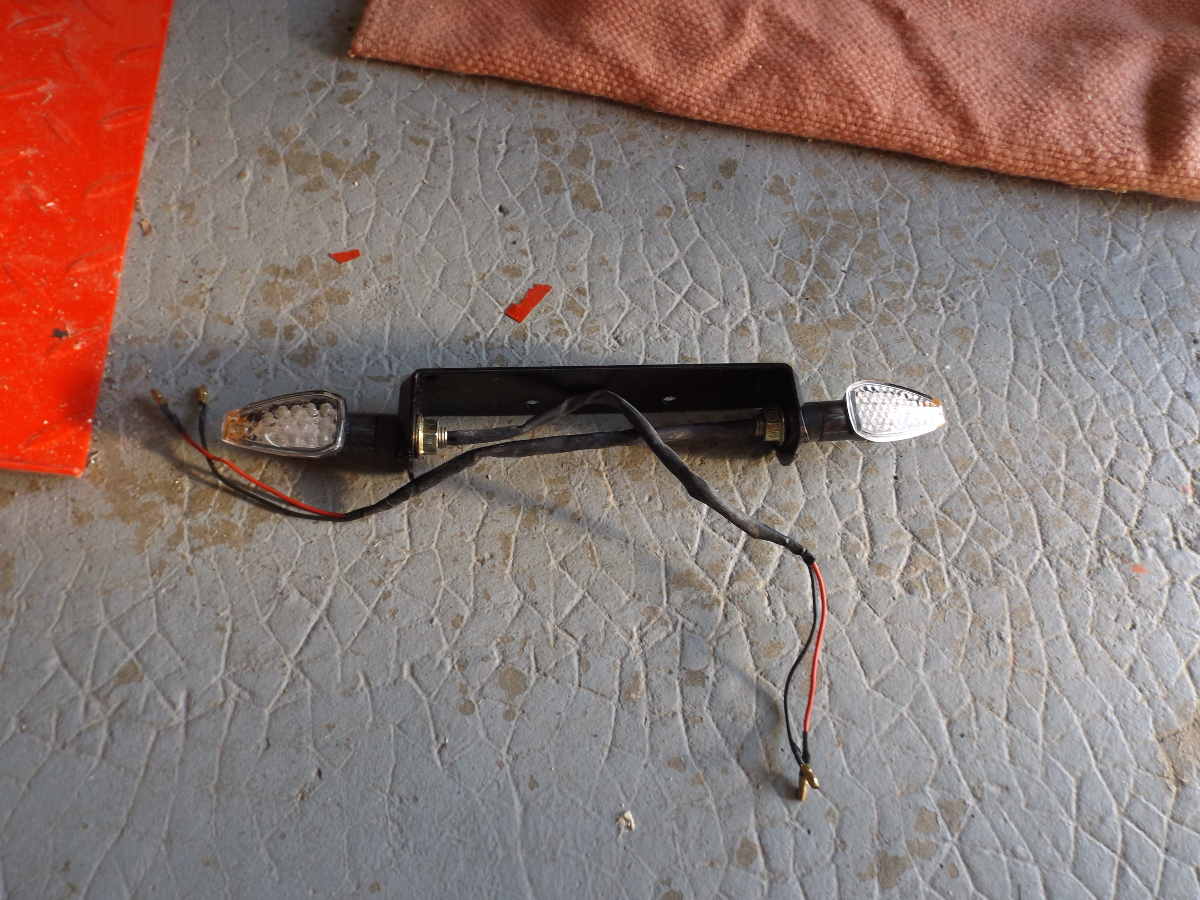 This picture shows the mount with the LED indicators fitted to it. Note that the indicators come with bullet connectors that are compatible with the Ducati wiring.
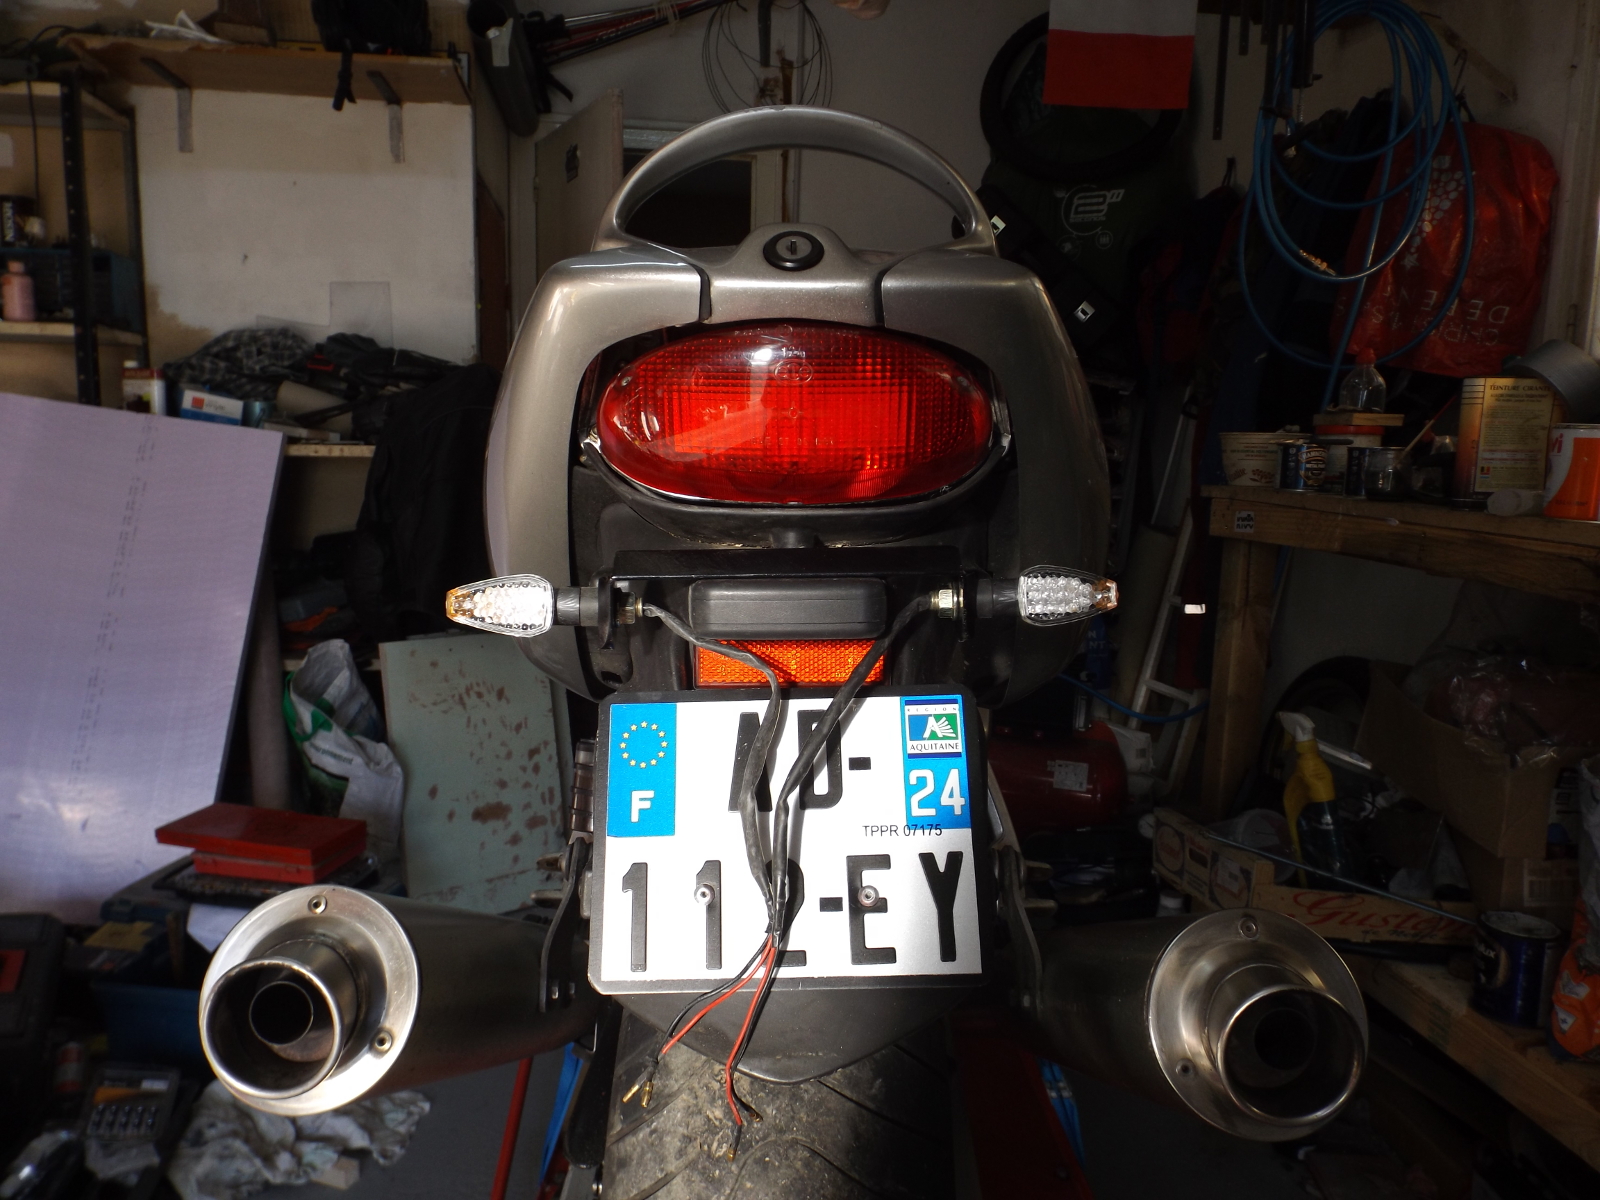 The whole mount was then fitted with two bolts attached to the plastic just forward of the numberplate mount. The cables have not yet been routed in this picture.
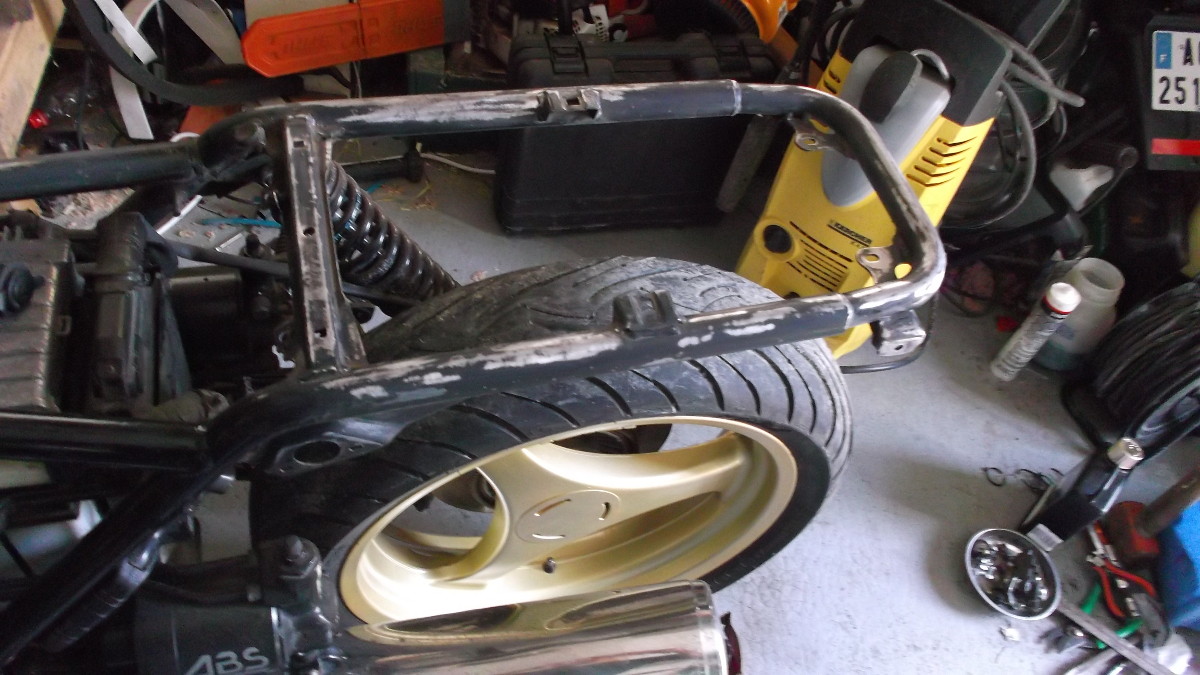
The other thing to do is to remove the rear part of the pannier frame where the indicators used to mount. This is just a 10 minute job with a hacksaw and some black paint, it does not affect the pannier fitting at all.
 This one has not yet been cut but the place to cut is the right hand side of the piece of wood so leaving the rubber button that touches the pannier. After this mod there will be no bits of ugly frame sticking out of the back of the bike.
You may find that the indicators flash more quickly with the LEDs fitted. There are two options to get them back to normal flash speed. The first is to order a three pin electronic indicator unit (relay) for less than €3 on ebay. The second option, which I used , is to remove the 10 watt bulbs from the front indicators and fit 18 watt bulbs. In my case I had some spare orange coloured bulbs so I also removed the orange shields from the front indicators when I fitted them.
It has been nearly a year since I posted anything about the brick. The simple reason is that the K100RS has been running like a Swiss watch. It starts every time, and runs perfectly. It has been used over the year as a camera platform with Gopro cameras mounted front and back, and has proved to be a very smooth bike for that task. My youtube channel has now got loads of videos of the local towns and roads around the Dordogne.
Another bike has now joined the stable, a silver Ducati ST2. The garage is getting a bit full with four bikes in the family and that includes the 125cc monkey bike. The ST2 is lighter and less powerful than the K100RS despite the 944cc Ducati engine. It also lacks ABS, but will be a new adventure in spannering as I have never owned a Ducati before now.
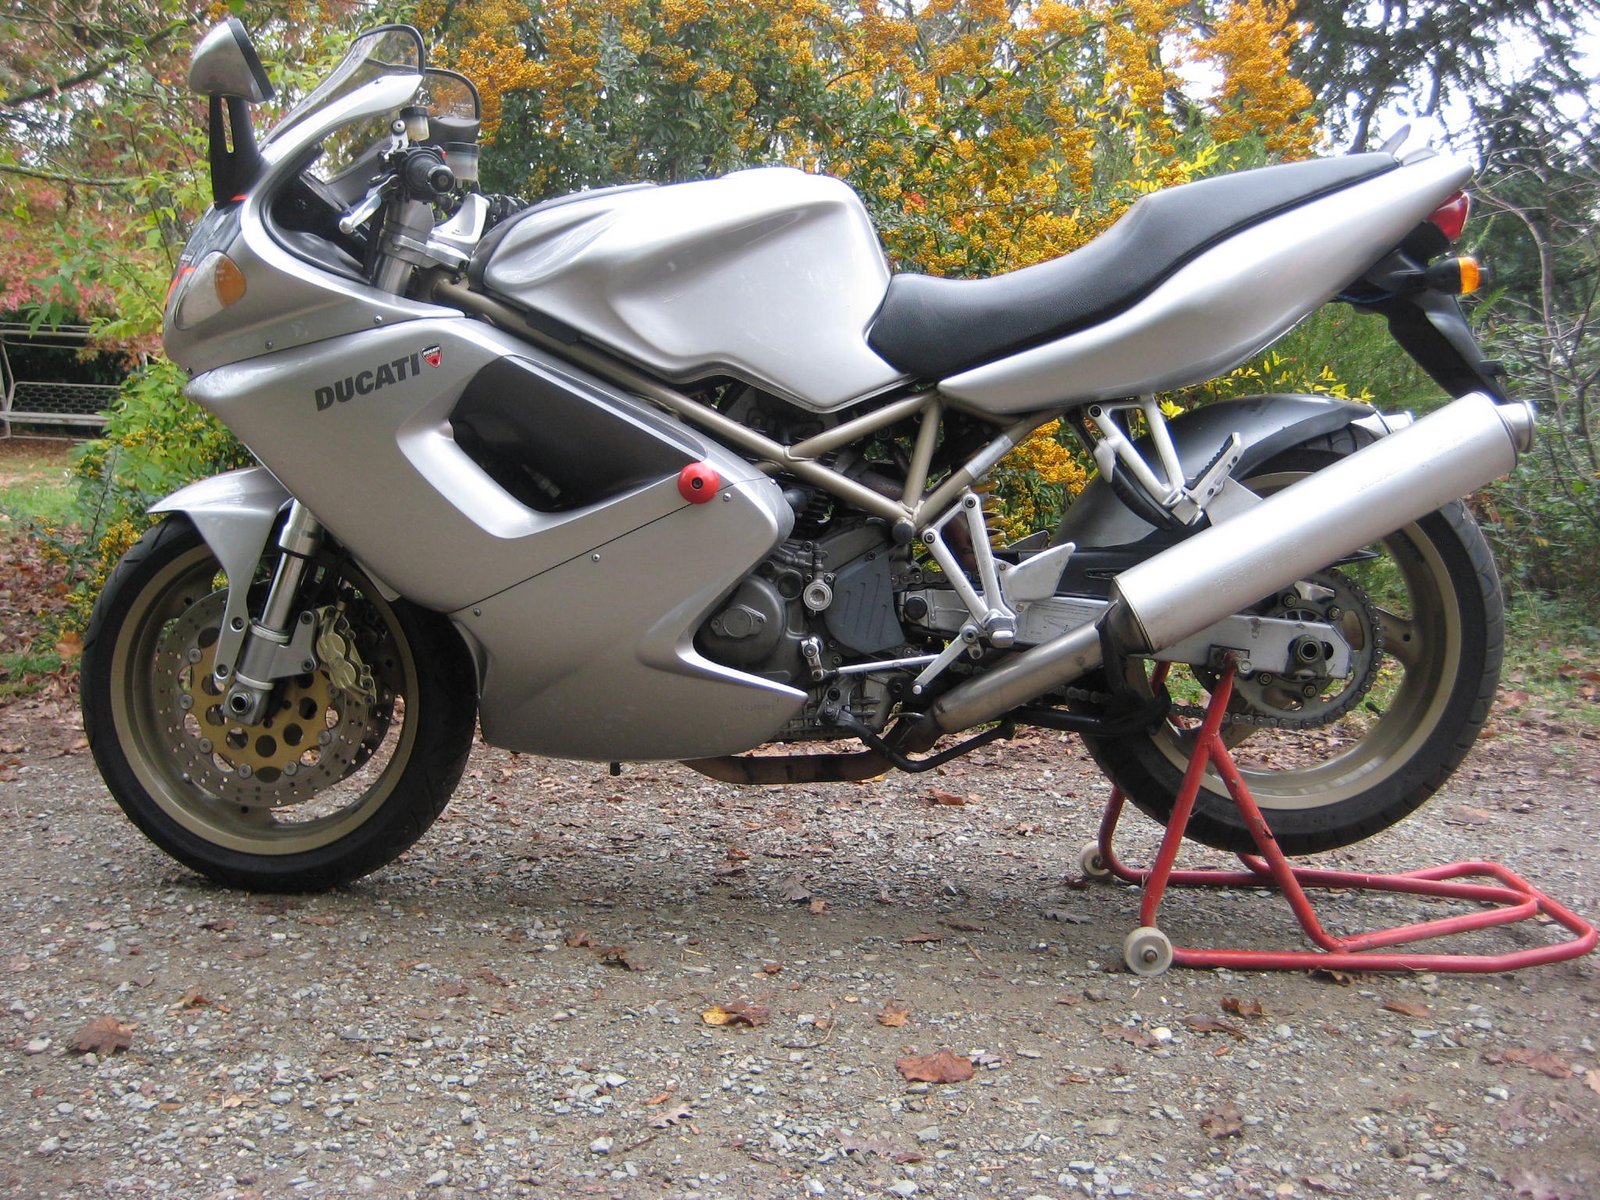
This picture was taken by the chap that I bought the ST2 from.
The bike now has a more modern gel battery, LED rear light, LED instrument lights and a few other things fitted. I will post later about the fitting of some of these mods, but the main one of interest to other ST owners might be the modification of the headlight – the standard dip beam halogen projector has been changed to a bi-xenon projector with a 35 watt HID inside it. More to follow.
My bike being a 16 valve, is different from the older K100s (8 valve) and different to the later K1100s. Mine was the one where BMW introduced many modern features including, better ABS, 16 valve engine, radial tyres on 3 spoke wheels, floating disc brakes on the front and a few other things. Most of this stuff carried over to the K1100, but the electrical system was still as per the older bike. This means a 32 amp alternator and a huge battery that would look fine in a diesel truck! The later K1100s got a 50 amp alternator and a smaller battery.
The battery on my bike was showing signs of weakness even though it was trickle charged with an Optimate charger every now and then. My wifes F800ST was similar. I bought a pair of Hawker Odyssey batteries (PC680 for mine and a PC535 for hers) from www.batteriemegastore.fr, which were very well priced. The Odyssey is an AGM battery with a huge amount of power in the cold cranking amps department. I have one fitted to my microlight and it will also hold its charge through many months of none use.
The PC680 is the same height and width as the old battery, but is half the depth, so overall half the size. It leaves loads of space in the battery tray. I can also be fitted any way up as there is no liquid acid in the thing – great on a bike as it won’t spill should you drop it. On that point I realise that the old battery is probably fine and has just lost some electrolyte as the bike was on its side when I first saw it!
Anyway with both batteries fitted it is amazing to see how quickly the engines turn on start up now.
As is normal on this blog, click on the pictures to enlarge them.
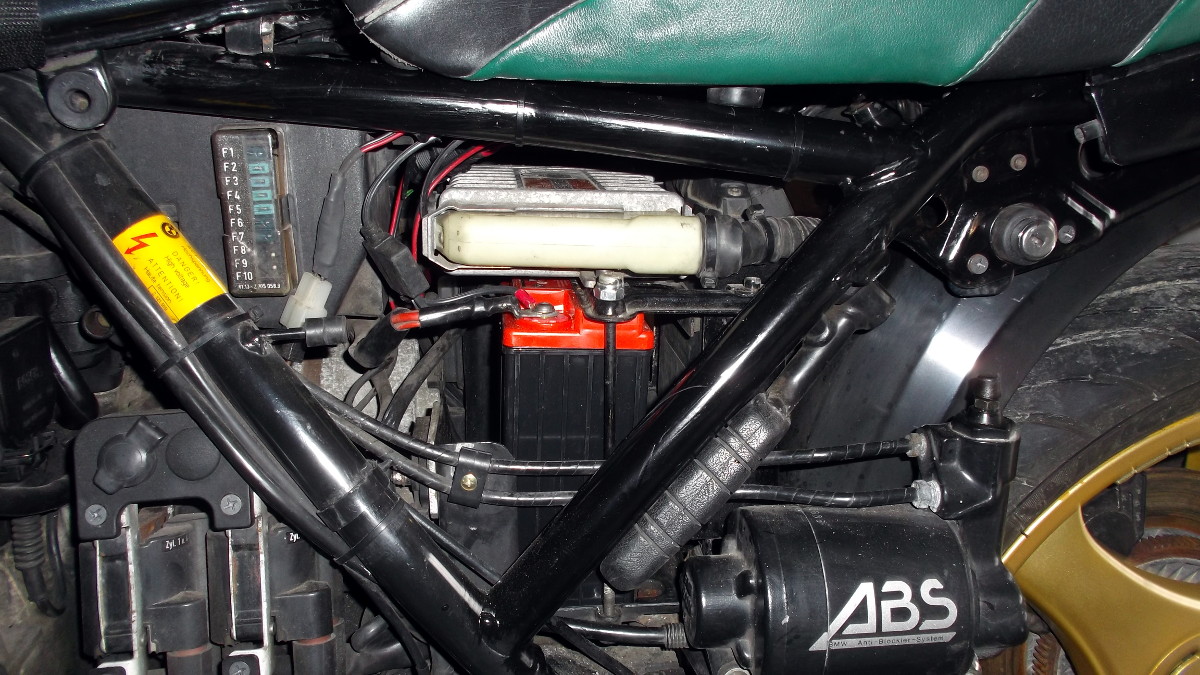
The red top part of the battery is half the width as the old one hence the space in front and behind the battery.
It has been a while since I blogged as I have been using the bike through last year. The bike has proved to be mechanically very good and returns well over 50 mpg. I put this down to the new throttle body rubbers and the very careful balancing of them. During August I took the 22 year old bike on the autoroute to see what she will do. Watching the GPS I wound her up to 145mph (232kmh) and held her there for a good ten minutes, I then pulled into the services to give here a look over and see if anything had fallen off/broken. Not a thing.
She has lived in the garage over the wettest part of the winter and while there was polished and checked regularly. I decided to remove the seat and rear plastic parts to see what sort of condition the back of the frame was in. After a very simple job and about 12 bolts later, I could see the rust showing through parts of the paint. They were rubbed down to bare metal as in the next photo.
At this stage I had considered using some phosphate to protect the bare metal before painting, but the corrosion had come off very well and I was using a paint that did not need that much preparation.
Out came the pot of smooth Hammerite paint that I had bought in the UK and a 20mm paint brush. Hammerite is great in that it goes onto bare metal, leaves no brush marks, dries within 3 hours and ends up very glossy and very hard.
Note the finish in this picture with the reflection on the bottom corner of the finished job:

The plastic mudguards which fit around the wheel were also well faded and looked grey rather than black. I tried a few different solvents to see if I could bring them back to the original colour without success. I ended up rubbing them down with 4000 grade Micromesh abrasive, followed by 8000 grade then rubbing compound and finally wax polish, the results are great.
Being a techno nut there are some things that need to be brought up to date on any machine some time after it left the factory. A good example of this is engine oil, which has advanced so much since the K100RS was built, that you cannot follow the recommendations that are in the owners manual anymore.
Another thing that has changed is efficient lighting – minimum power fro maximum visibility. This is where LEDs come in. The first thing to do is to remove the BMU (bulb monitoring unit) that BMW fitted when light bulbs used to blow (LEDs don’t). The BMU was there to tell the rider that the back light is not working. It takes 10 minutes to remove and bypass. The second thing to do is to cut pin 7 of the microchip known as a U243B inside the flasher unit so that the indicators don’t flash like mad with LEDs fitted due to the lower power consumption. If you Google “U243B” you will get the idea.
Now for the pictures:
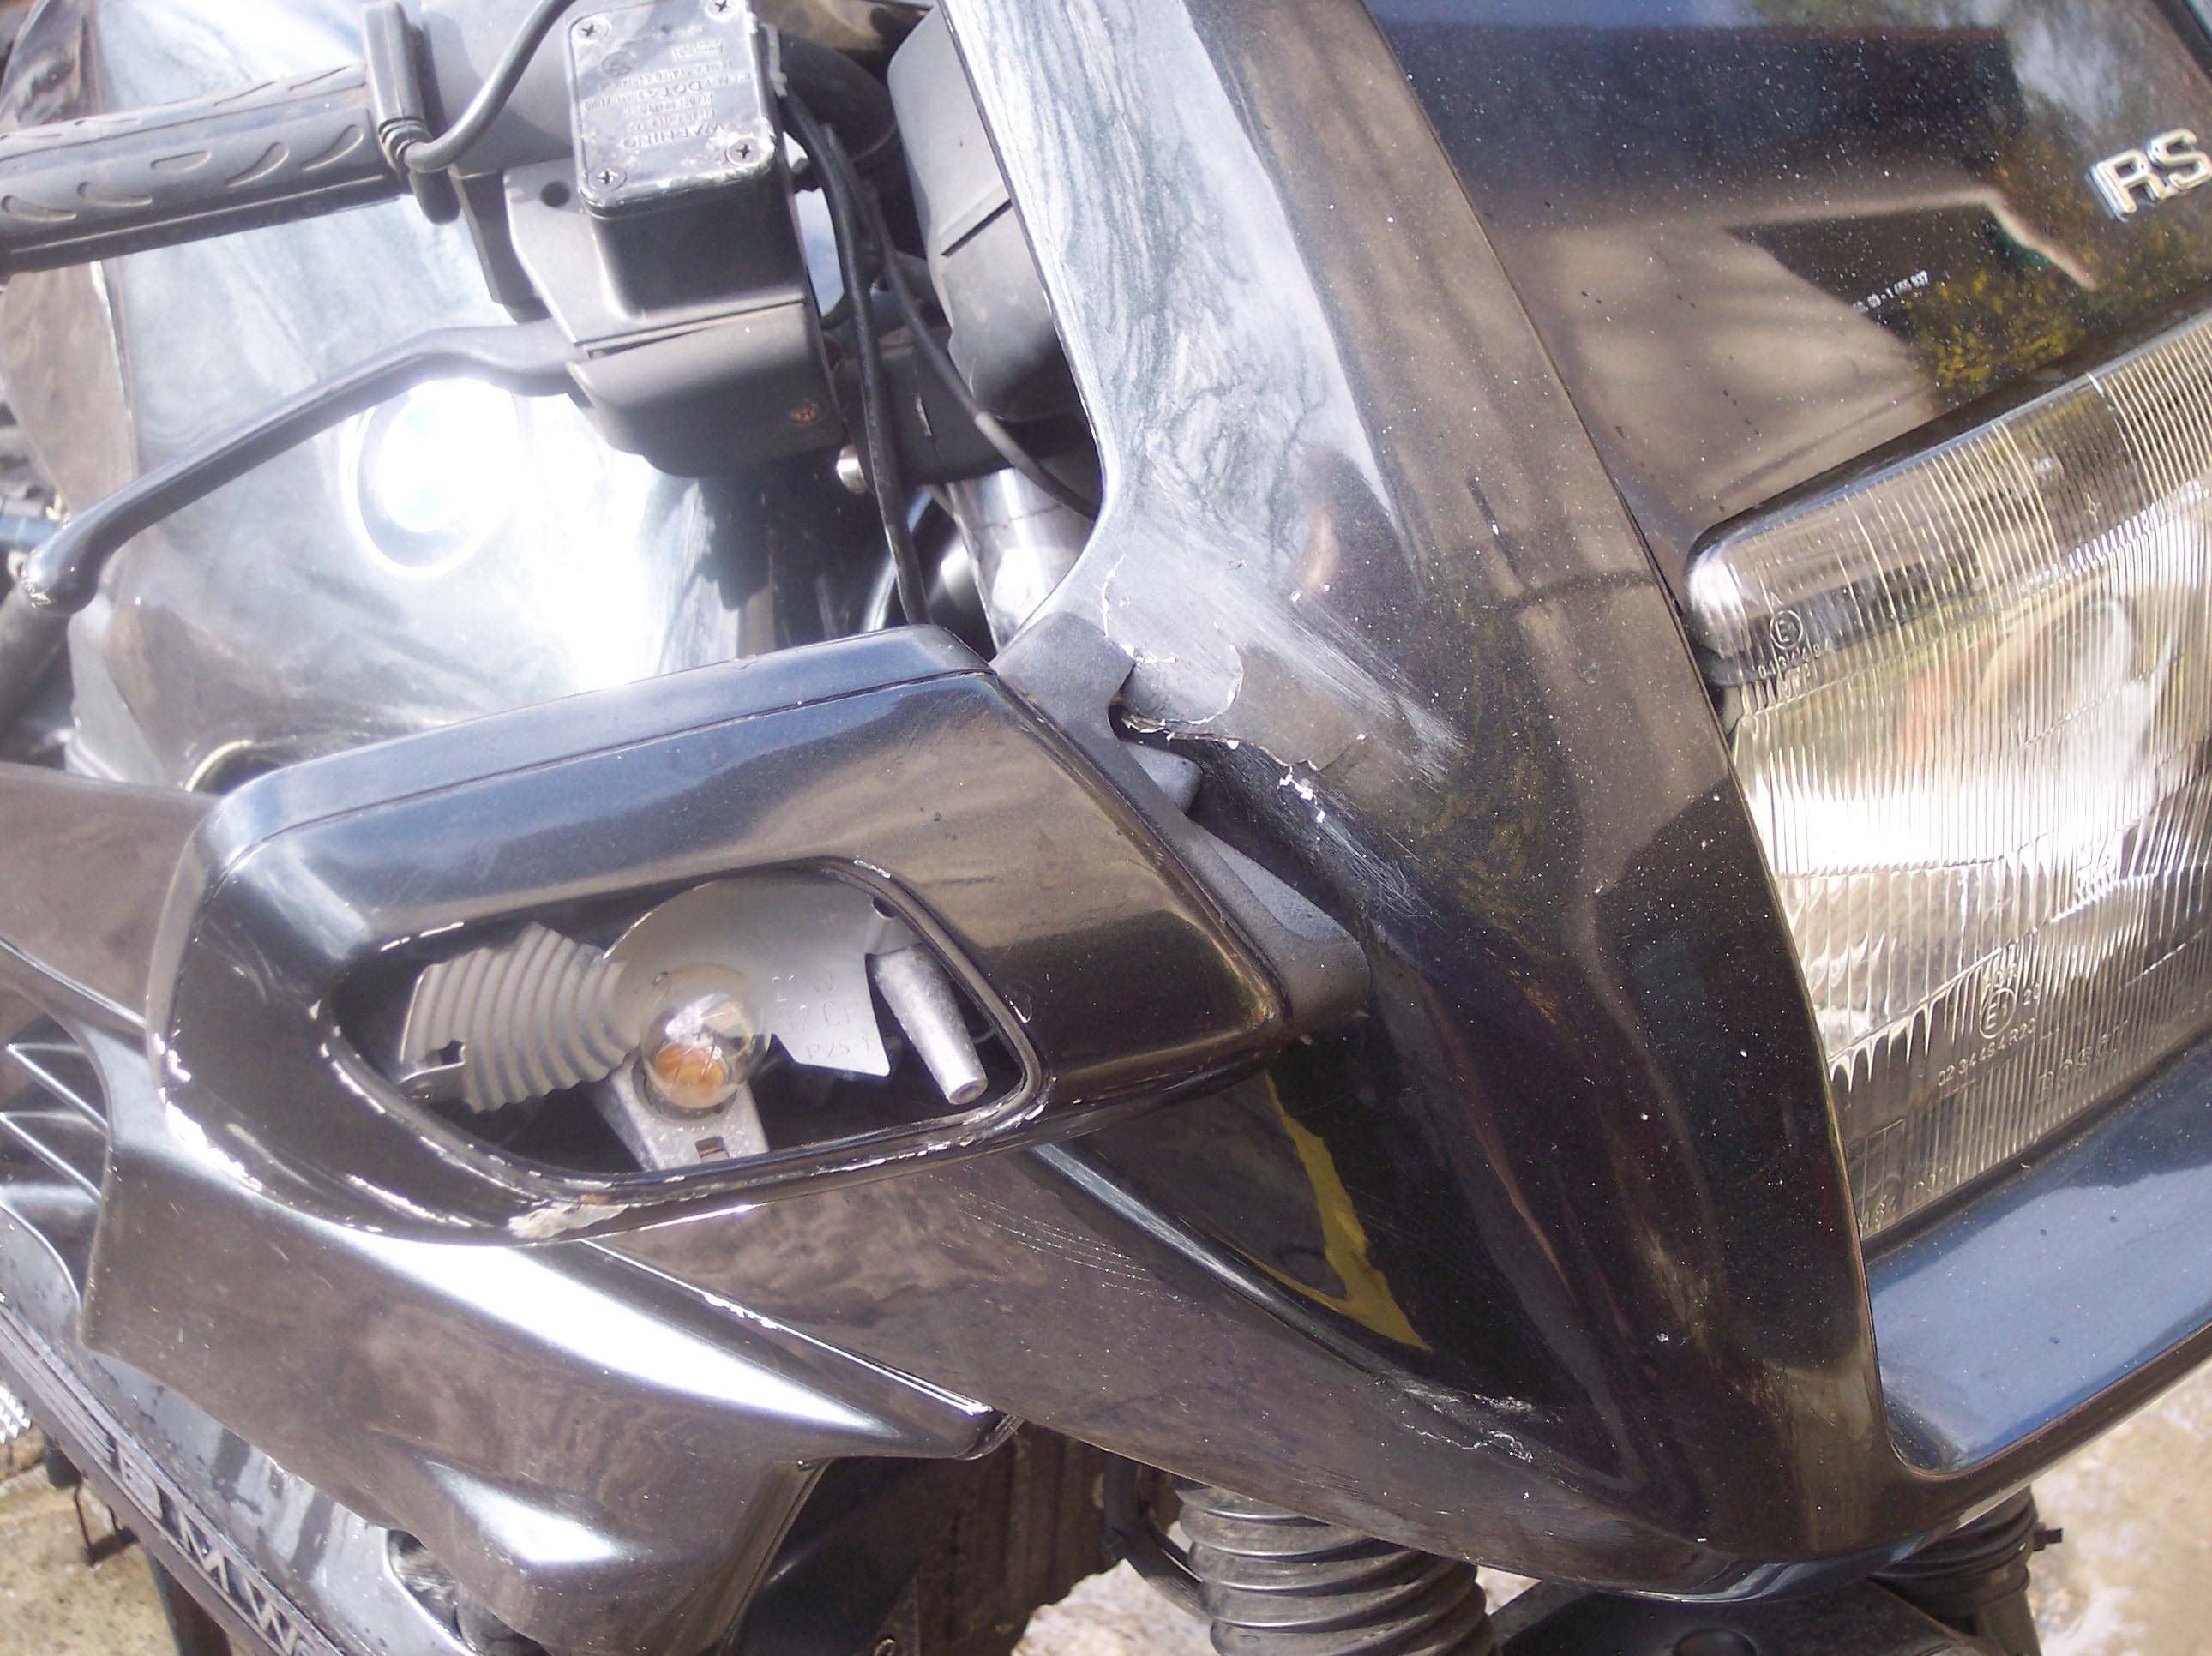
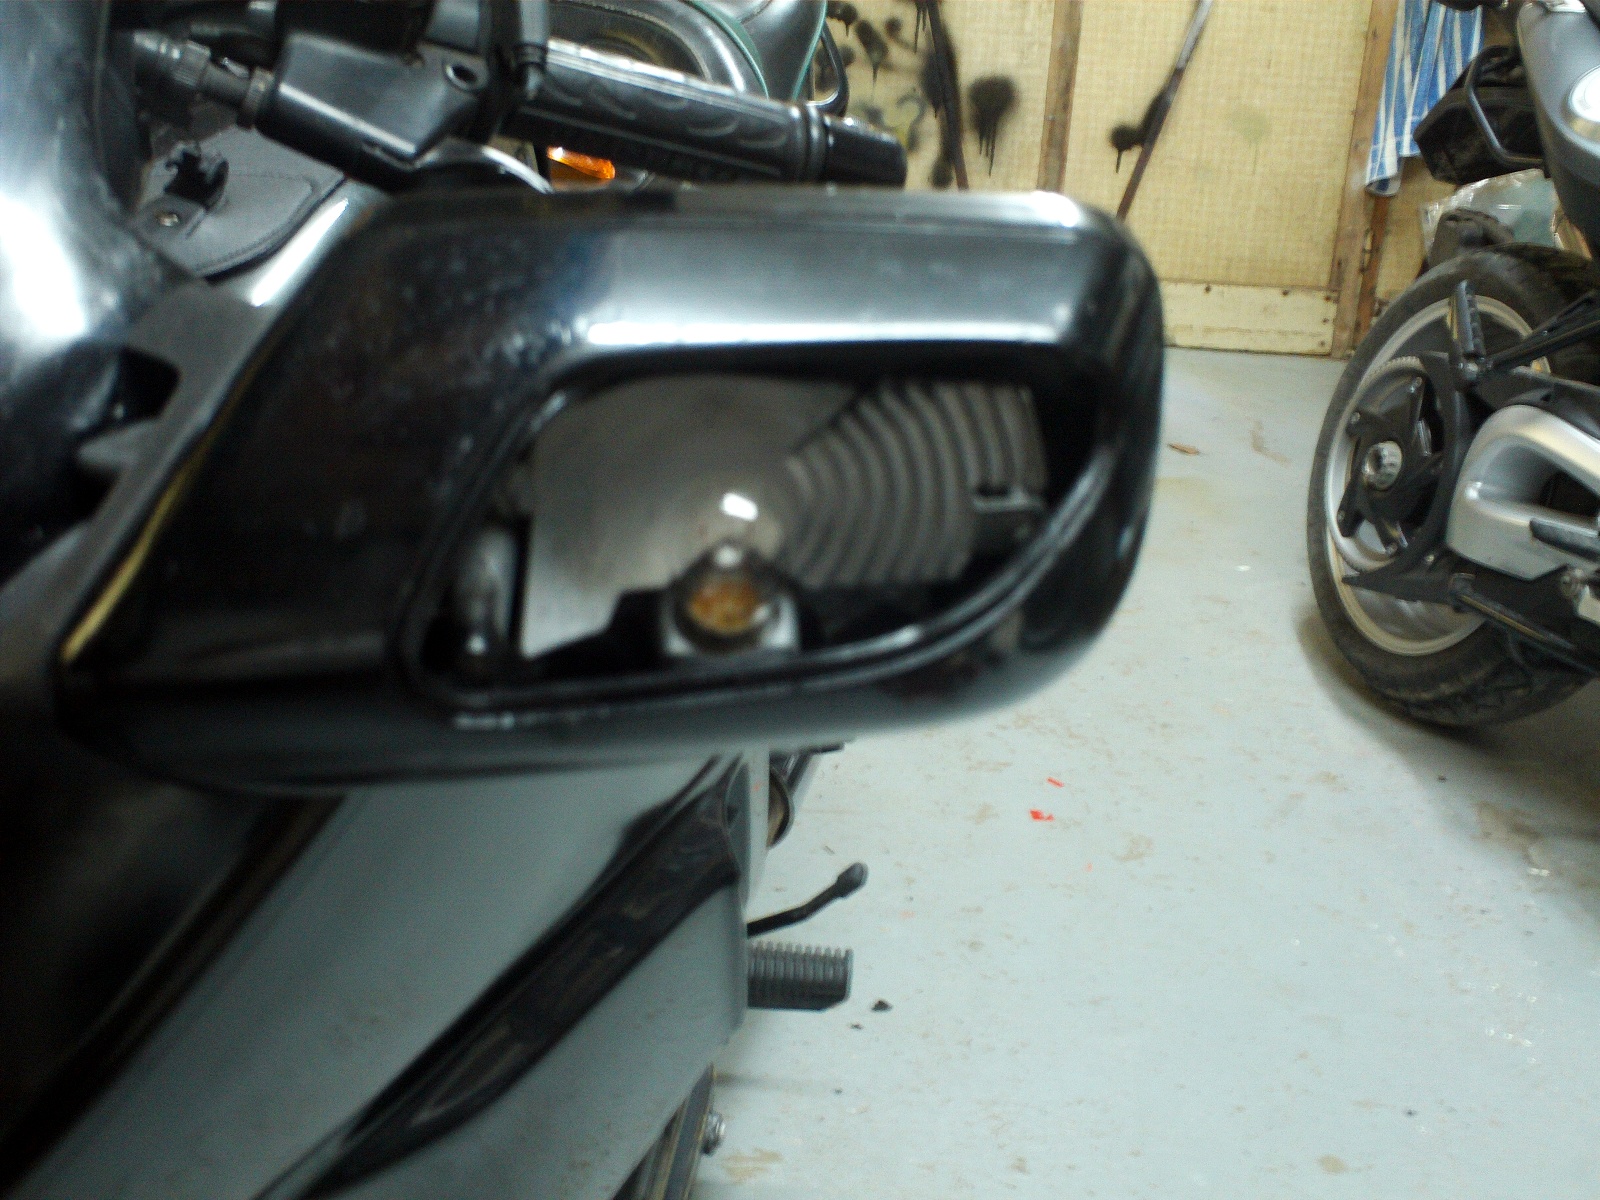 The first picture shows the standard 21 watt bulb fitted into the indicator which is covered by an orange plastic lens.
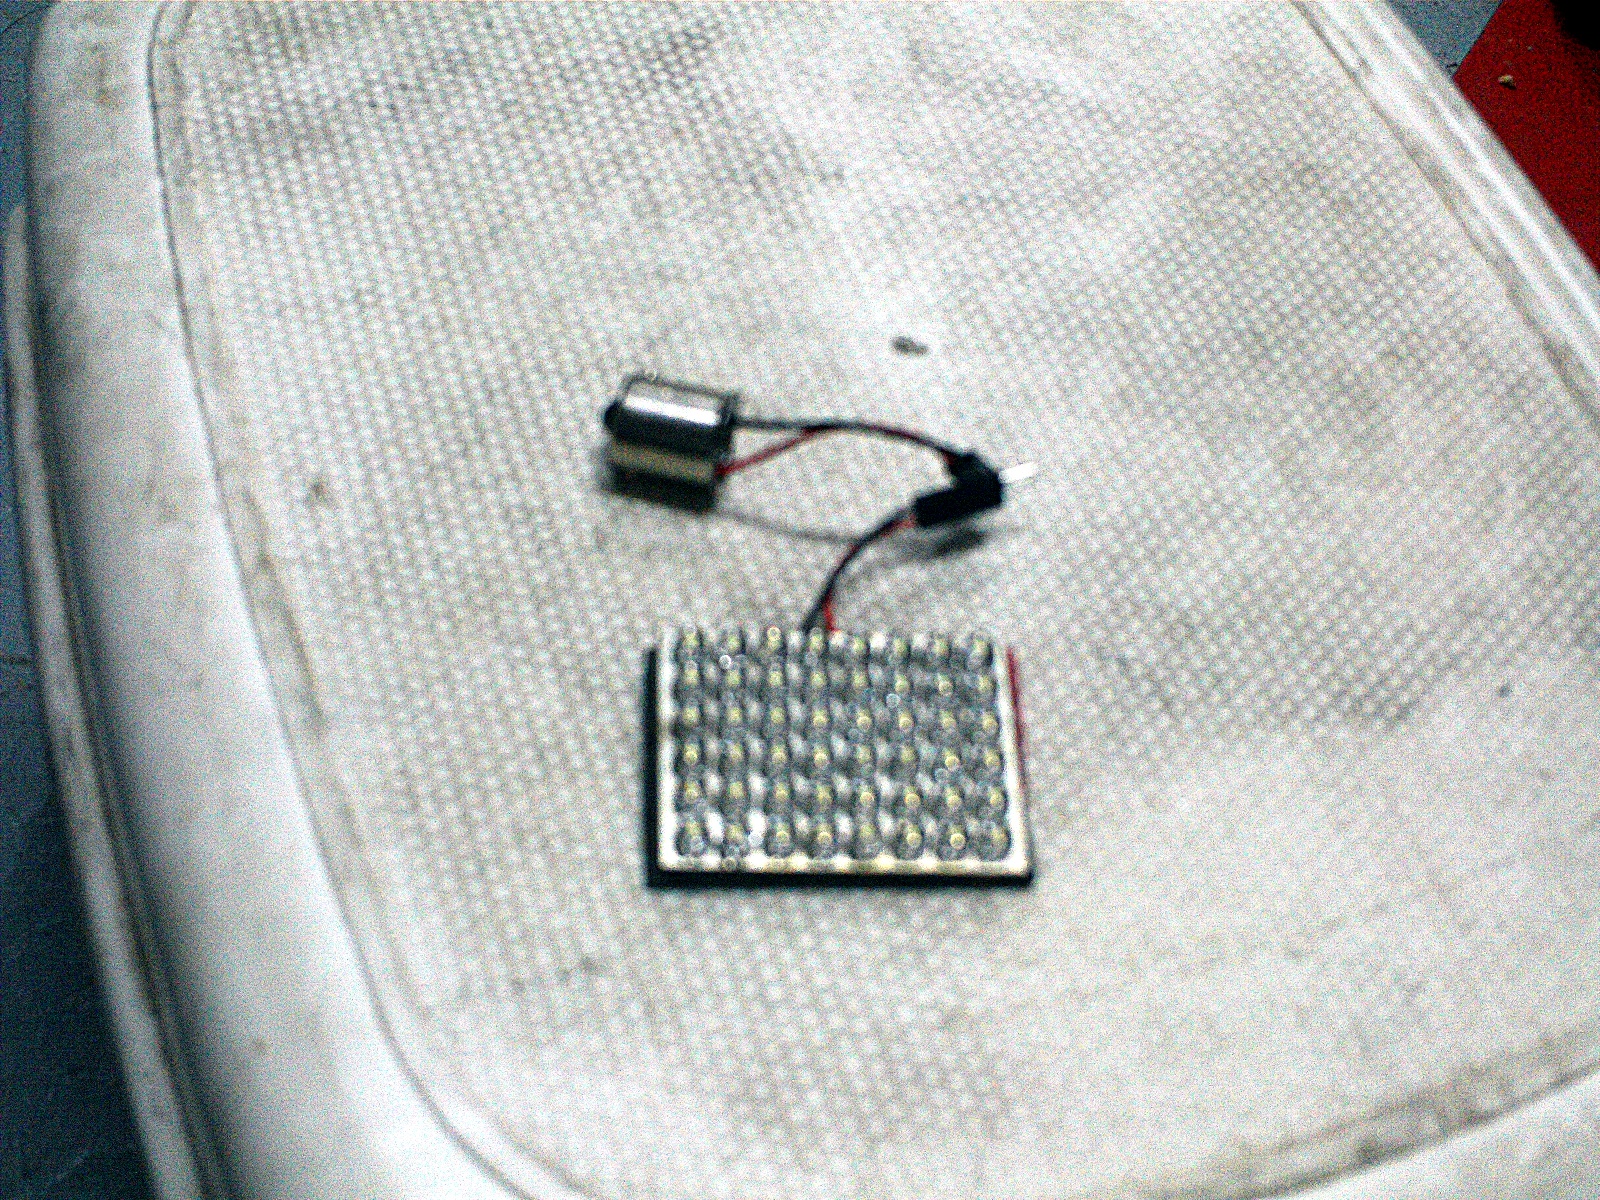 So we take a square of LEDS that are sold for about £3.50 on ebay and come with a B15 fitting to plug them in.
 These squares come with a sticky backing, but I have used a hot glue gun to hold the corners as I don’t want them falling off and rattling.
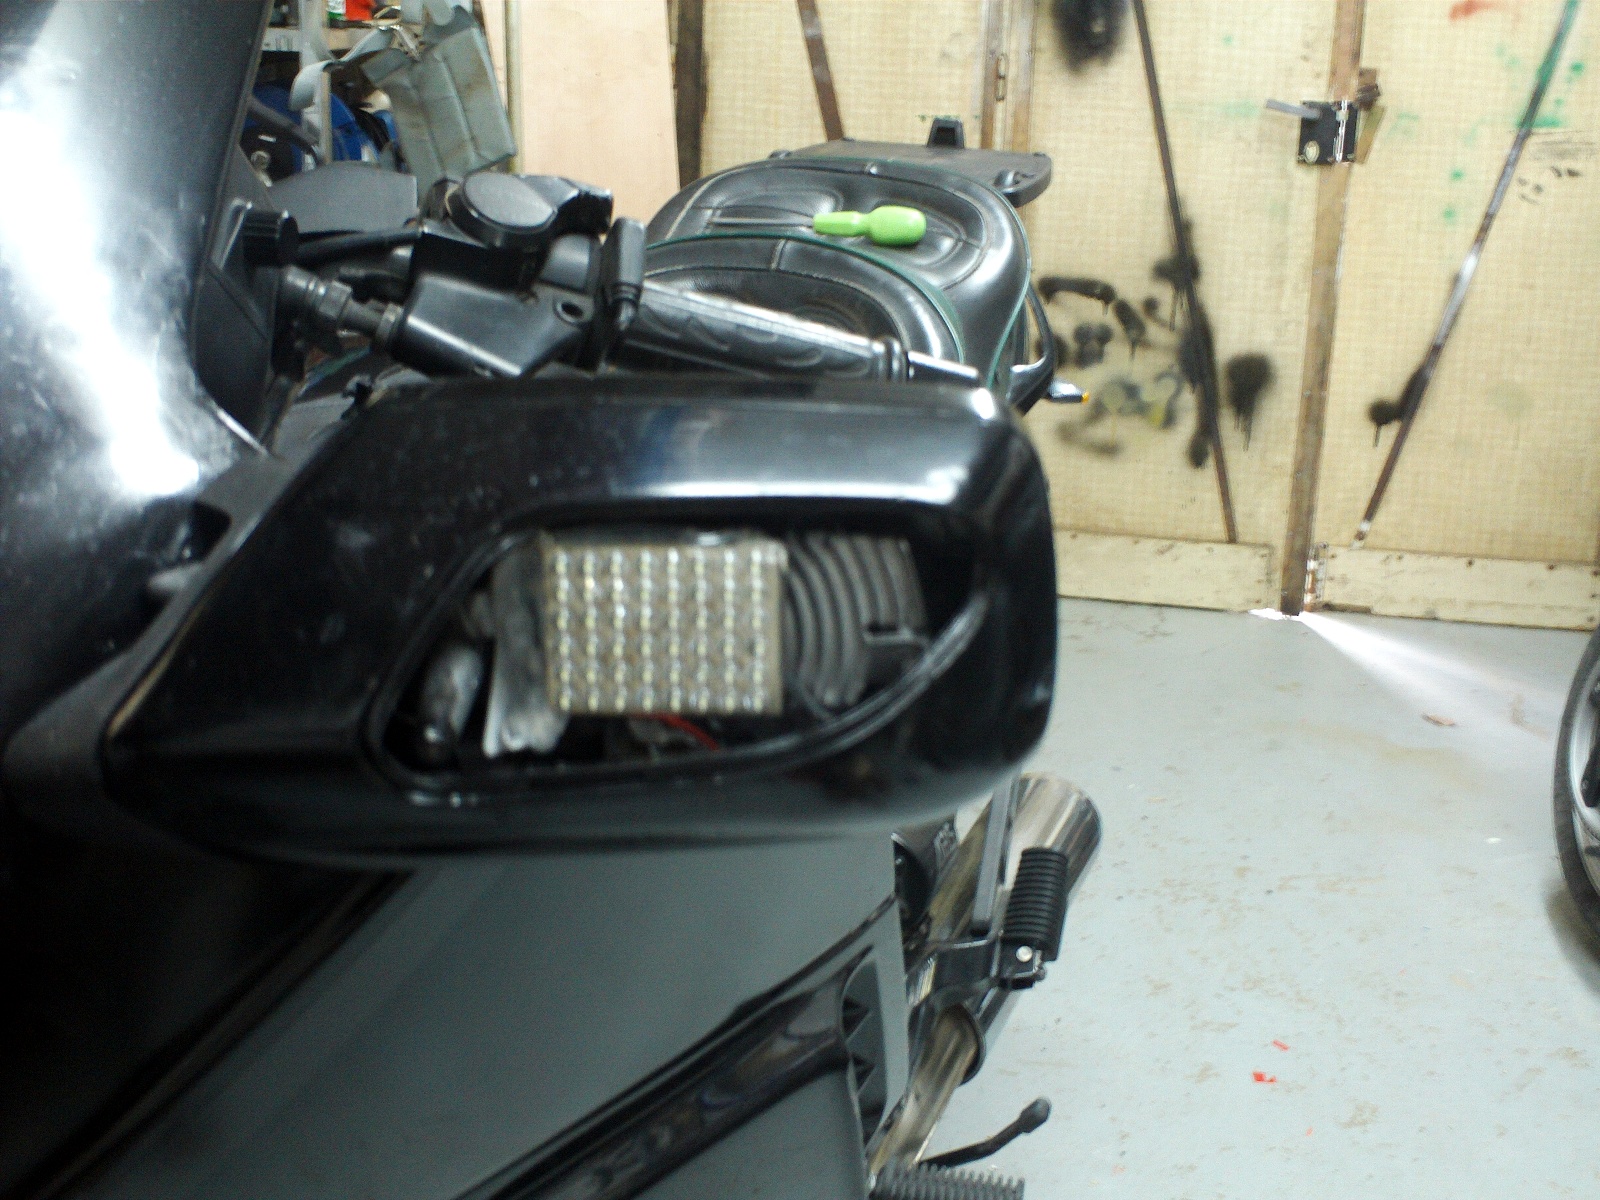
 This picture shows the old and the new illuminated. The new is on the right as you are looking at the picture. So 21 watts consumption on the left and around 2 watts on the right. While I had the 4 way flashers (hazards) on to take this picture, it looked like the two sides were out of sync, that would be impossible. What was happening is that the old bulbs were taking longer to illuminate than the LEDs. Another bonus the LEDs come on quicker! Note the LED strip in place in the top of the headlight, this replaces the crappy little sidelight bulb that was in the middle before.
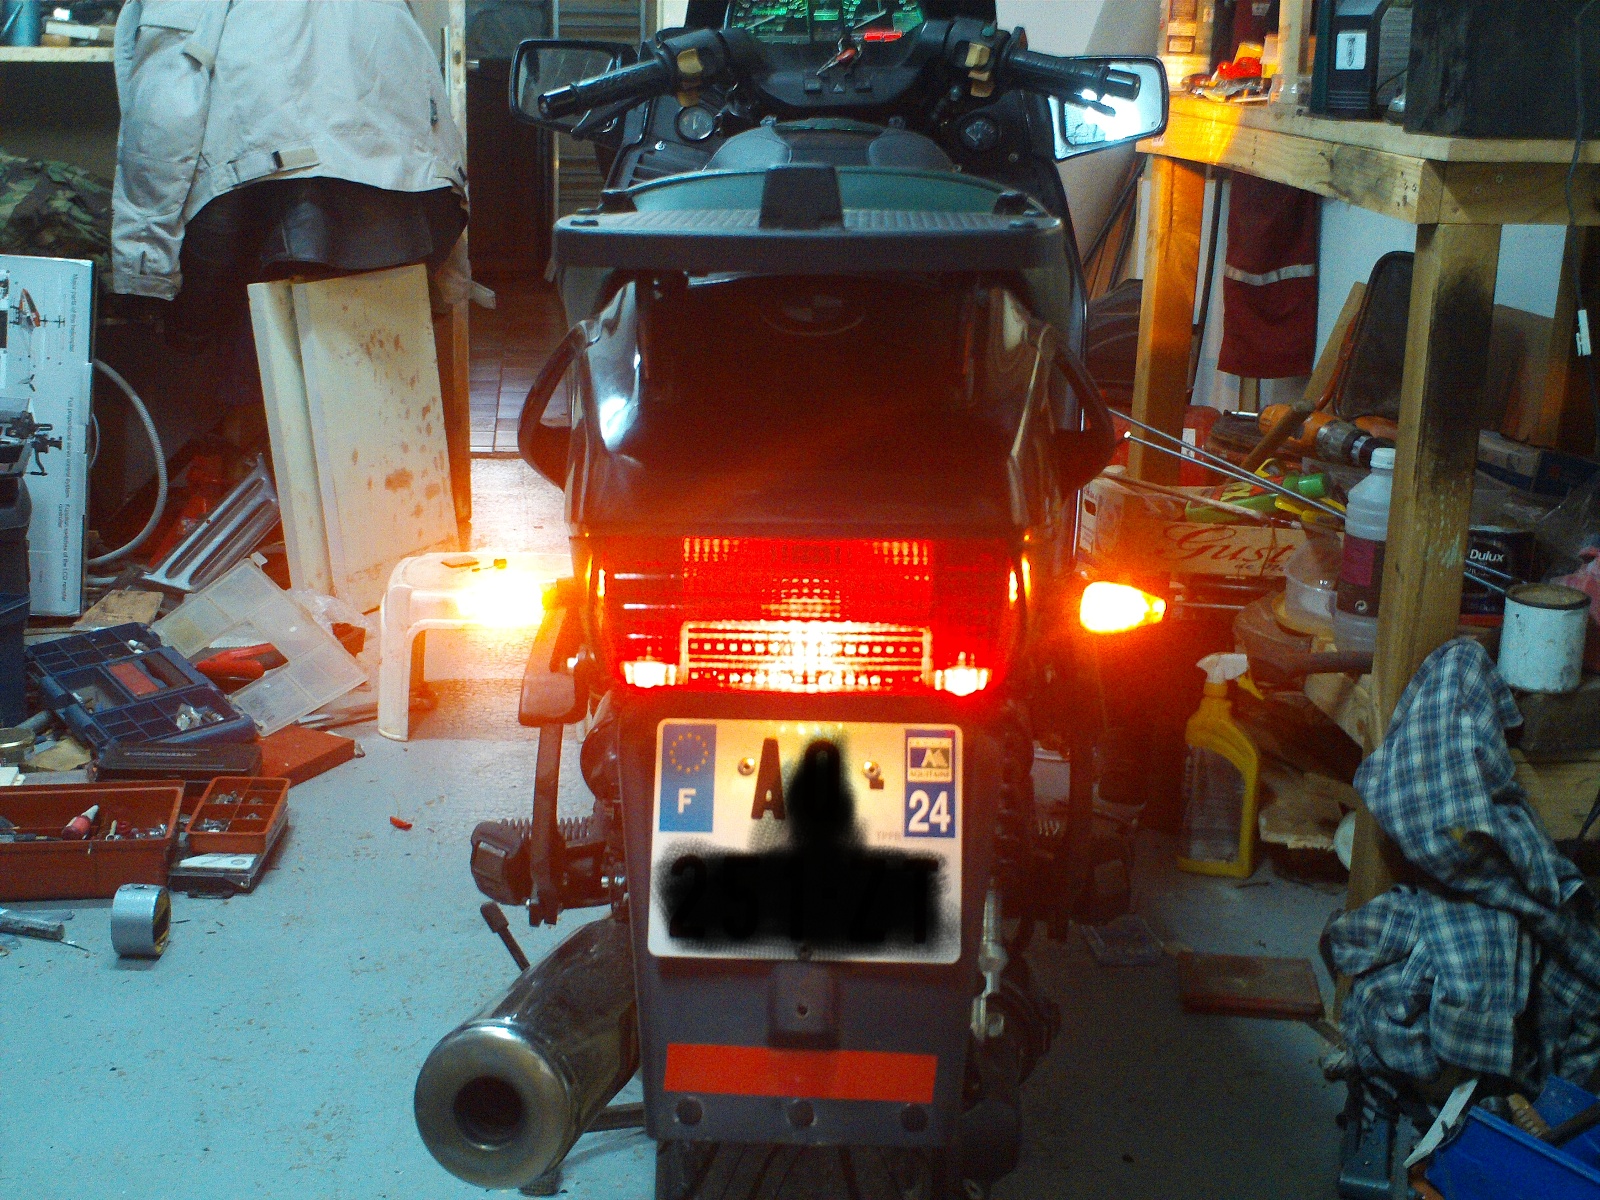 Now for the rear. I have a set of ebay LED indicators (about £5) fitted. They are a bit small but are brighter then the originals which were huge and ugly.
 This picture shows the rear light. It should be a 10 watt bulb, but I found that was burning the plastic due to the heat. I fitted a 5 watt bulb and a pair of 10mm LEDS on each side. If the bulb fails then the LEDs will still illuminate, this proves that I don’t need the BMU. The next step is to get hold of a spare rear lamp and build a complete LED array into it. For now I may just put a couple of LED panels into this one to replace the 5 watt rear bulb.
 The instruments also have LED back lighting. The LEDs cost around £4 from ebay and are very easy to fit after removing the pod and working at a desk.
Click on any picture to see a bigger version, but be aware that the camera that I was using is not very good at macro pictures.
Owning a BMW K100RS is a bit like a car that I once owned, a Citroen XM diesel. They are both technically very advanced, not easy to work on, fantastic to drive, and a bit long on the tooth now.
Back on topic! Various bits were repaired, repainted or replaced to get the bike back to a condition where I could take him out on the road to see what was seriously wrong with him. I had a large package delivered from Motobins in the UK with things like a seat lock, indicator lenses, etc. Cans of gloss black paint had made the plastic look a little better and a set of wheels were bought from a chap in France complete with brand new Michelin Pilot Road 3 tyres, these were sprayed gold. The wheels are a different size to other K100s and a different 3 spoke design too, they fit the wider 160 rear tyre.
The first time that I started him up with my helmet firmly on my head was a very daunting time. After slipping him into gear and finding that the 80W140 gear oil and MSO2 had made the gearbox as smooth as a Jap bike, I let the clutch out and was pleased to find that all of the ABS warning lights extinguished. That was working then!

The second ride out with my wife on her F800ST as my wingman, showed a few more things that will need sorting, but there was nothing major that would cause me to abandon the project. That ride showed that a new rear shock was needed, it felt dreadful, we called it a pogo stick! There was also some setting up needed on the fuel injection system as the power delivery was not smooth, although it pulled like a diesel (reminded me of the Citroen XM again).
The rear shock was ordered from RAM (http://www.realmengineering.com/page15.html). I phoned them and spoke to a nice chap who spoke with a Brummie accent and reminded me of my dad. After giving him my weight, and some other information he charged £300 to my debit card and sent me a shock. Only an ex-engineer would see the beauty in a bit of metal the way that I do, but even my wife commented that it was “nice”.

This has transformed the bike! It has a infinite adjustment adjustment for the spring pre-load and a knob for adjusting the damping. After a 20 mile ride I had it set up just how it suited me . As the bike was now definitely a good one I also ordered the front brake discs from www.bikes.ebcbrakeshop.co.uk/ who have been very helpful over the phone and supplied what must be the the cheapest brake discs on the net. Having said that they were not cheap, just cheaper than anyone else.
I started taking bits off that had not fallen off by themselves. The seat was fastened on with one bolt and the seat lock did not work.
The rear pannier rails are also removed in this picture due to the damage that had been repaired with a piece of very rusty metal and some pop rivets.

After a pressure wash I could see that huge task that was ahead of me. I am not sure why all of the alloy that had been painted black by BMW originally was now falling off and leaving some red stain behind, but that was not my priority. It is very difficult to leave something like that while making sure that things are mechanically sound. Even the painted alloy rear wheel had corrosion blistering the paint. This was not too much of a worry as I have spent 25 years of my life working on aircraft and alloy corrosion was part of my trade. The wheels would end up painted a nice gold colour in the end anyway.
The front of the fairing was also a mess with no indicator lenses and a badly repaired fairing. Everything is available fro a BMW so the indicator lenses were ordered along with a pile of other bits from the UK.
The fairing is quite easy to remove and had to come off to check some of the bits behind it. When it was off I looked at the front brake pads and found that they were down to the metal, I ordered a set of EBC pads from the UK. It was then that I measured the front disc thickness, they are modern floating discs so are thin even when new. New is 5mm, wear limit is 4.5mm and I found mine to be at 3.5mm! Beside that the bobbins were very loose – new discs needed. It was at this point that I noticed that there was a bit of play in the steering head bearings so I took the brake callipers off and removed the front wheel. Something did not look quite right with the wheel and that was when I noticed that it was dented very slightly. To top it all I had a leaking fork seal which I noticed when I moved the fork gaiters out the way.
Things were not looking good at this stage. I looked around for a spare front wheel but as this is a 16 valve bike, it has wider wheels than earlier machines, eventually I found a pair of wheels on Leboncoin and bought them, the owner even threw in a set of fork seals.
The problem was that I was now spending money on the bike when I did not yet know how reliable it was going to be, if it would run nicely or end up as a dog, or even if the ABS would work as you cannot tell before you run the bike and get all the sensors turning.

This is the bike partially stripped. It sits in my garage next to my office which is a good thing as I can pop in there and doe some little job while waiting for the weather to warm for the bigger jobs. As it turned out, I found myself removing things like stands and footrests so that I could clean them up and repaint them.
More later.
My first task was to make a plan. Many things needed fixing on the bike before I could even think of taking it out on the road, but I had to make sure that I did not spend a fortune on fixing bits only to find that the engine was a wreck. For that reason the mechanical side had priority over any cosmetic work.
There are three main oils to change on this, engine, gearbox and final drive. I happened to have an engine oil filter, left over from my R1100S, on the shelf in my garage. The engine did start, but I had no idea how long the oil had been sitting in it. As this bike is the 100 bhp 16 valve version it is fitted with a belly pan under the engine, that had to come off and was put to one side for a coat of paint. Next was the mounting for the belly pan, a very rust and tatty thing that was held on with solid bolts, two of the bolts sheared in the engine sump.

The belly pan mounting.
The engine oil drain and the filter were then removed and left off overnight to make sure that all of the old oil was out, the sump was also removed for a clean. The next morning with the sump back on and a new filter fitted, the engine was filled with 5W40 fully synthetic oil. The bike had been connected to an Optimate battery charger all night so with one press of the starter button she was sitting there ticking over and sounding very sweet.
The gearbox oil was then drained, I love the distinctive smell of gear oil, and a quantity of peanut butter coloured liquid came out, I knew that some of it was oil due to the smell. I refilled with a measured quantity of Castrol 80W140 gear oil, I say a measured quantity because at the time I did not know that the C spanner in the bike toolkit is also the dipstick for the gearbox. I also added half a teaspoon of MoS2 powder for good measure. BMW gearboxes can be quite clunky and I have used this method in the past to smooth them a bit. The finalo drive was treated to the same oil without the MoS2.

Gearbox oil draining.
The next job was to sort the rear brake. In the picture below you can see that a previous owner has messed about with the ABS on the rear by connecting the hydraulic input to the output which means no ABS on the back brake!

This picture also shows the condition of the alloy on some parts of the bike. After removing the rear brake calliper and connecting all the brake pipes correctly, I set about the task of cleaning everything up. The calliper was freed as the pistons were seized, and refitted to the very rusty brake disk – that would have to stay for now as they are expensive, the long job of bleeding the air out of the lines was next. First the fluid was bled from the bleed nipple on the ABS “pot” (in the picture above) then from the nipple on the calliper, it took me hours to get it so that clear fluid was flowing from both points.
When we left the sellers house for the 2 hour journey home, we discussed what we had seen. It was a sad sight indeed to see a wonderful machine like that is such an unloved state. This K100RS was the 16 valve version of a bike that had been in production for about 8 years and had won many awards from all over the world. The particular one that we had just looked at was the 100 bhp 16 valve version. It was very different mechanically to the earlier models, but kept the same styling. The obvious difference was in the name, the engine had four valves per cylinder (hence 16 valves) rather than two. It also had wider wheels, so that the modern radial tyres can be fitted, and floating disc brakes on the front. There was also some difference in the rear suspension. It came with fuel injection, electronic ignition, and even ABS brakes both front and back.
A couple of days later the seller contacted us and accepted our offer. We headed north again with the trailer attached to the car and loads of tie down straps. When we arrived the bike was still on the stand in the barn, so we pumped the flat tyres up and pushed it outside, the brakes were a little seized so it was not easy. I tilted the trailer and started the bike up to ride it on. The bike started despite having not run for quite some years I suspect. Once on the trailer we started to tie her down.

Note the state of the poor bike in this picture, the rusty rear disc brake, mirrors missing etc.
 Interesting drive back on Christmas eve with a bike looking into the rear window of the car all the way!


After unloading and parking the bike on the side stand, it seemed to be leaning a long way to the left. A good look around told us that there was going to be some work on this! The bike was named Ronnie after Ronnie O’Sullivan, the best snooker player in the world.
I bought my first BMW bike, a new R75/7, in September 1977 as a teenager. Many bikes have passed through my possession since and many of them have been BMW, but only two have been the K series, known as the brick.
The first K was a K100RT ex-police bike that I owned in the early 1990’s. It was a very capable machine even being a little boring due to the ability of being very reliable despite the high mileage.
The second one was a K1200GT bought brand new in 2004. It had the heated seat and grips, electric windscreen and loads of toys to play with. There cannot be a better bike for tearing down the French motorways at illegal speeds, in company with my wife on her Honda Blackbird, looking for a potential new home.

Both of those bikes were changed for a brace of BMW R1100S’s just before we moved to France at the end of 2004. The R1100S’s were eventually sold a couple of years ago, but last year my wife bought herself a very smart BMW F800ST. The ST is a nice light bike built to the standard high quality expected from BMW with 85 bhp.

The hunt was then on for a bike for me. An F800 would also suit me but I needed a hobby too. Just before Christmas we answered an advert for a 1991 BMW K100RS 16 valve. The first sight of the bike laying on its side in a barn was very sad and I realised that there was plenty of work to do to it, but such a classic bike deserved it. I left having made an offer to the owner.
